Tuesday, September 11, 2018

Resin Roses

The latest thing I have been completely obsessed with is resin. My head to overflowing with ideas. I've been doing it for about 3 months now.

I will include more details on this in a later post, but for now I want to tell you about resin rainbow roses. While browsing though YouTube I found this interesting resin pour to try: https://www.youtube.com/watch?v=noepJdsHts8

I had to try this, so here goes...

First Attempt:


So my first attempt with the roses failed because of bubbles, but they looks pretty and colourful, and rainbowy.


What a messy process with all the colours. I used an existing rose mold I had made. I put the left over rainbow resin in the pendant molds.

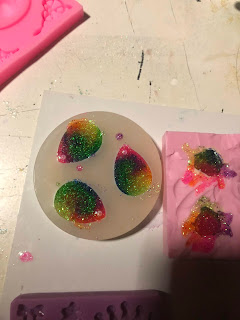
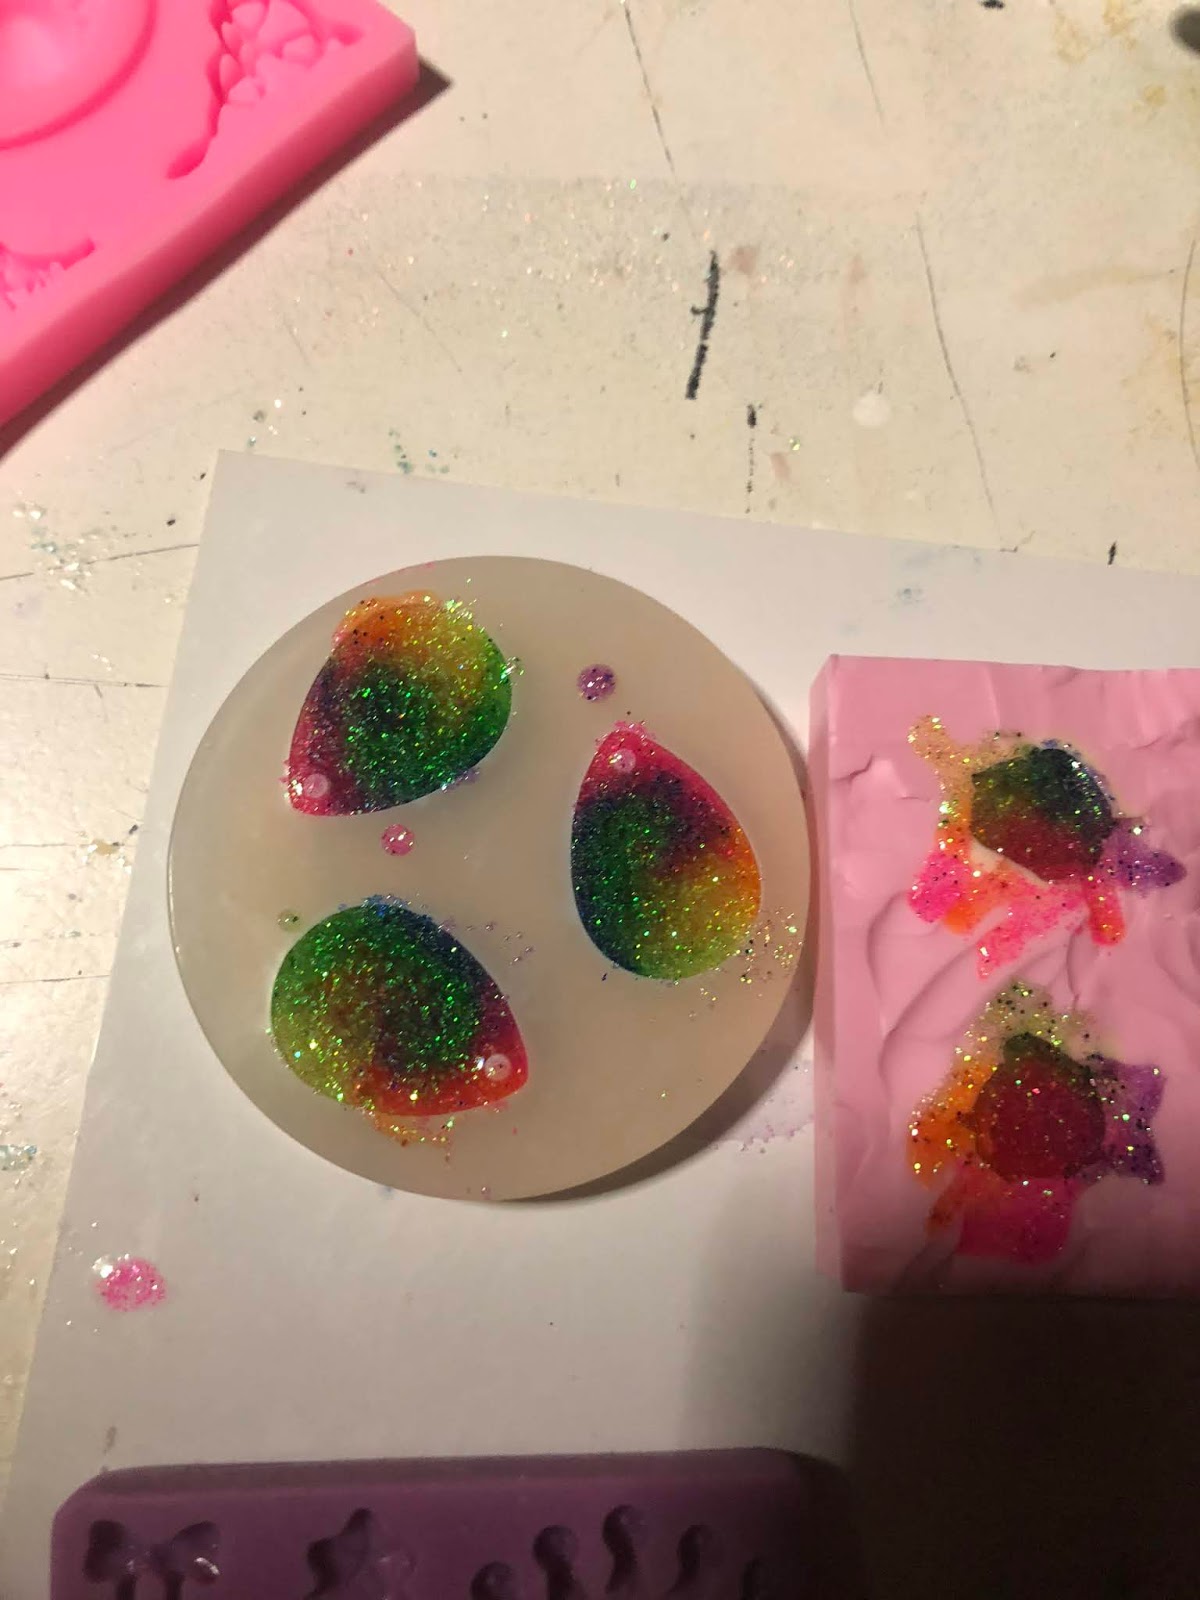
The rainbow pendants came out very nice too.


Not sure if it’s photographing well. 


Messy but fun.

Making new Moulds:


I didn’t like or have any decent rose mounds.

So I popped into the Beads for Africa in Montague Gardens and scratches out some roses bead and other things to mold.


The new attempted at rainbow roses in my new mound. Not bad.

But now everywhere I go I’m on the lookout for better mound-able roses (and everything else).


Making another new Mould:


Then when unpacking my bead stash, and having roses on my mind, I realized I had some very old roses from The Bed Shop on Long street (May it Rest In Peace).

And some rose stickers from China Town in Milnerton. These are totally mound-able


And so I did.


Making more Roses:


No more rainbows now just flowers. Some are still getting bubbles.

I used all my rose/flower moulds. I even did tiny little black glitter roses.


The bronze roses are full of bubble, but I was thinking it looks like they rusted (idea: rusty roses for steampunk).


These are the tiny roses. I got the original from a Planet Nails in Table View.

Saturday, August 25, 2018

Starting the ride

So, I'm still new at the blogging part, and I haven't writing any crafty things since my first blog a long long time ago.

However after discussion with some friends I am finally going to make a go at this, so here goes.

I will hopeful be writing about the projects I am currently working on, and how to turns out. I will also be covering old projects from over the years.

I hope you enjoy the ride ;)

I have also created

Here you can see what I've made and help me make more cool and interesting things. I like to learn new skills all the time, so lets see what we can make :)


Wednesday, July 3, 2013

Portable shelf blocks

Welcome to my first crafty blog article.

The first project that I will be tackling here is “Blocks”. The idea is to have portable shelf blocks, which are loss, & stackable.

I had an idea . . .

 photo IMG_1502-1.jpg
I decided to do the blocks 300mm square inside. This would make a nice size block, & its about the same size a scrapbooking page. I found out the width of the wood was 18mm.

I put together a basic plan . . .

 photo IMG_1499.jpg
I then popped into the local hardware store. I ordered some cheap wood, & was happily surprise to find out they even cut it for you. So I eventually left with a boot (car trunk) full of wood pieces.

Ready to go, with all the pieces of wood . . .

 photo IMG_1386.jpg
This is not the pretties work environment, I know. It’s our garage, but it’s the only area in the house I can separate myself from my 1 ½ year old munchkin  If you’re a mom, you know, they just want to play with, what you got, & stick it in their mouths.

Ingredients to build 9 blocks:

  • Drill, with the correct drill bit
  • 108 wood screws (one for each corner, & one in the middle of each side)
  • Wood:
    • 18 pieces -> 300mm X 300mm (width 18mm) = Sides
    • 18 pieces -> 336mm X 300mm (width 18mm) = Top & bottom

Back to work . . .

Our garage is a nice “work” work area, so I cleared my work space, & got everything I needed together.
 photo IMG_1390.jpg
I matched up the corners, held tight, & drilled.
 photo IMG_1392.jpg
Rather over the drill the screws in, than let them stick out, because you can always fill the screw hole.
 photo IMG_1403.jpg photo IMG_1394.jpg photo IMG_1398.jpg

The final product . . .

 photo IMG_1407.jpg
I'm, a lot, out of practise using the hardware tools, so it didn't line up perfectly but, nothing that can't be fix with a little sanding.

Next time . . .

The next step is to sand down the rough wood, & not perfectly lined up corners. Then it can be painted. Now you know what will be in my next blog, I’ll keep you updated.